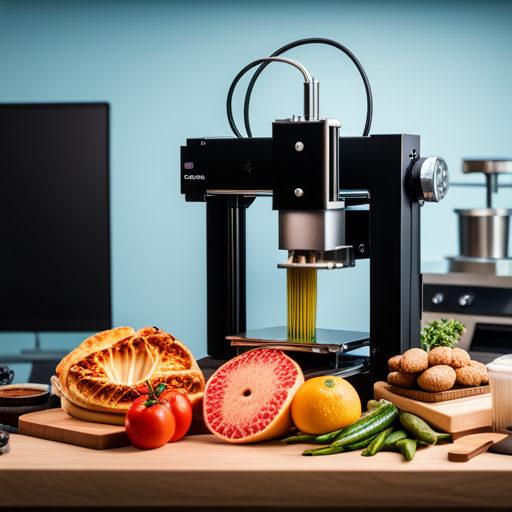
Embarking on the innovative journey of food 3D printing often entails encountering various technical challenges. From clogged nozzles and inconsistent textures to adhesion problems and filament jamming, troubleshooting common issues is integral to achieving optimal results.
This article delves into the precise techniques and solutions for addressing these challenges, providing a comprehensive guide for those seeking to enhance their proficiency in the realm of food 3D printing.
Clogged Nozzles
One common issue encountered in food 3D printing is the occurrence of clogged nozzles, which can significantly disrupt the printing process. Preventing clogs and maintaining nozzle integrity are crucial aspects of ensuring smooth printing operations. Troubleshooting print quality issues often leads back to the condition of the printer’s nozzles. Nozzle cleaning techniques play a pivotal role in addressing and preventing clogs.
To maintain the integrity of the nozzles, regular cleaning is essential. This can be done using various techniques such as manual cleaning with a fine needle or using cleaning filament designed specifically for 3D printing equipment. Additionally, implementing preventive measures like using high-quality, filtered food-grade printing materials can significantly reduce the likelihood of clogs.
When print quality issues arise, it is important to inspect the nozzles for any signs of blockage or buildup. Addressing these issues promptly through proper cleaning and maintenance can help in preventing further complications.
Inconsistent Texture
When addressing inconsistent texture in food 3D printing, two key factors to consider are printing temperature control and material composition adjustments.
The printing temperature directly impacts the texture of the printed food, and adjusting it can help achieve the desired consistency.
Additionally, altering the composition of the printing material can also play a significant role in ensuring a consistent texture in the final 3D printed food product.
Printing Temperature Control
To achieve consistent texture in 3D printed food, it is crucial to meticulously control the printing temperature. Several factors influence temperature control, and understanding them is essential for successful food 3D printing:
-
Printing Speed: Adjusting the printing speed can help regulate the temperature of the printed food. Slower printing speeds allow for better heat distribution, resulting in a more consistent texture.
-
Cooling Fans: Properly functioning cooling fans are vital for maintaining the printing temperature. They help prevent overheating and ensure that the food material solidifies at the desired rate, preventing texture inconsistencies.
-
Material Properties: Different food materials require specific temperature controls. Understanding the properties of the material being used is essential for achieving the desired texture in 3D printed food.
Material Composition Adjustments
When addressing inconsistent texture in food 3D printing, making material composition adjustments is essential for achieving desired results.
Inconsistent texture can be attributed to the material strength and print speed used in the 3D printing process. To address this issue, adjusting the material composition to optimize the material strength is crucial.
A stronger material composition can help maintain the desired texture throughout the printing process, preventing deformities or irregularities in the printed food.
Additionally, fine-tuning the print speed according to the material composition can further enhance the consistency of the printed food.
Warping and Curling
Experiencing warping and curling in food 3D printing can significantly impact the quality and accuracy of the printed food items. To address these issues, several strategies can be implemented:
-
Warping Prevention Techniques: Properly adjusting the printing temperature, utilizing a heated build platform, and incorporating support structures can help mitigate warping. Additionally, optimizing the cooling process during printing can also contribute to reducing warping.
-
Material Considerations: Selecting the appropriate food-grade material with suitable properties, such as low shrinkage and good adhesion to the printing surface, is essential for minimizing warping and curling.
-
Curling Troubleshooting and Printer Settings Adjustment: Analyzing and adjusting the printer settings, such as the layer height, print speed, and fan cooling, can aid in addressing curling issues. Moreover, ensuring that the printing environment is free from drafts and maintaining consistent ambient temperature can help prevent curling.
Understanding and implementing these warping prevention techniques, material considerations, and curling troubleshooting methods are crucial in enhancing the overall quality of food 3D printing.
Now, let’s delve into the subsequent section about ‘adhesion problems’.
Adhesion Problems
Addressing the challenges of adhesion problems in food 3D printing requires thorough consideration of material properties and printer settings, which are essential for achieving optimal print quality. One common issue is the lack of adhesion between layers or between the print and the build plate. To address this, proper surface preparation is crucial.
Ensuring the build plate is clean and applying adhesive aids such as food-safe adhesives or specialized build surfaces can significantly improve bonding. Additionally, adjusting the print bed temperature according to the specific food material being used can enhance adhesion. Some printers also offer features like heated enclosures to maintain a consistent and optimal print environment, thereby improving adhesion.
Furthermore, understanding the material properties of the food being used is essential. Different food materials may require different surface treatments or adhesion-enhancing techniques. Experimenting with surface treatments such as oiling the build plate or using edible coatings can also help improve adhesion.
By carefully considering these factors, it’s possible to achieve improved bonding and minimize adhesion problems in food 3D printing.
Transitioning into the subsequent section about ‘filament jamming’, it is important to address another common issue that can impact the quality of food 3D printing.
Filament Jamming
To optimize food 3D printing, it is vital to troubleshoot and mitigate filament jamming, a common issue that can disrupt the printing process. Filament jamming can occur due to various reasons, including inconsistencies in filament diameter, inadequate heat distribution, and improper printer settings.
-
Filament Diameter: Variations in filament diameter can lead to jamming. It is crucial to use high-quality, consistent diameter filament to ensure smooth extrusion and prevent clogs in the printing nozzle.
-
Heat Distribution: Uneven heat distribution within the printing nozzle can cause filament to melt at inconsistent rates, leading to blockages and jams. Regular maintenance and calibration of the printer’s heating system are essential to prevent this issue.
-
Printer Settings: Incorrect printer settings, such as incorrect temperature or speed settings, can contribute to filament jamming. It is important to ensure that the printer is configured according to the specific requirements of the food material being used for 3D printing.
Understanding and addressing these factors can significantly reduce the occurrence of filament jamming, allowing for a more seamless food 3D printing process. Addressing filament jamming issues can also improve the overall print quality and reduce material wastage.
Moving on to the subsequent section, let’s delve into the challenges related to poor layer adhesion.
Poor Layer Adhesion
One common issue encountered in food 3D printing is the inadequate bonding between layers, which can compromise the structural integrity of the printed food items.
To address poor layer adhesion, several layer bonding techniques and adhesion improvement methods can be employed. One effective technique is to optimize the extrusion temperature and speed to ensure proper fusion between successive layers.
Additionally, adjusting the infill density can enhance the overall adhesion of the printed layers. Utilizing food-safe adhesion promoters, such as vegetable oil or food-grade sprays, can also significantly improve layer adhesion.
Another method involves modifying the design of the food item to incorporate interlocking features between layers, promoting better cohesion. Furthermore, implementing post-processing techniques such as heat treatment or ultrasonic bonding can enhance the adhesion between layers.
It is crucial to experiment with various combinations of these techniques to determine the most suitable approach for addressing poor layer adhesion in food 3D printing, ultimately ensuring the production of structurally sound and visually appealing food items.
Over-Extrusion
Over-extrusion in food 3D printing can lead to excessive material flow, resulting in print quality degradation and potential nozzle clogging issues. This can cause the printed food to be less accurate and aesthetically pleasing.
Understanding how to identify and address over-extrusion is crucial for maintaining high-quality 3D printed food products.
Excessive Material Flow
Excessive material flow, also known as over-extrusion, can lead to issues in the quality and accuracy of food 3D printing. It is crucial to address this issue promptly to ensure optimal printing outcomes.
To troubleshoot excessive material flow, consider the following:
-
Material flow adjustment: Evaluate and adjust the material flow settings to ensure the appropriate amount of material is being extruded.
-
Understanding extrusion: Gain a comprehensive understanding of the extrusion process and the factors affecting material flow to identify and rectify any irregularities.
-
Troubleshooting tips: Utilize troubleshooting techniques such as adjusting nozzle temperature, checking for clogs, and calibrating the extruder to mitigate over-extrusion issues efficiently.
Keeping these aspects in mind can help resolve excessive material flow problems and enhance the overall performance of food 3D printing processes.
Print Quality Degradation
Print quality degradation can result from over-extrusion when conducting food 3D printing. Over-extrusion occurs when the printer deposits more material than required, leading to a deterioration in print quality. This issue can be attributed to factors such as excessive print speed and incorrect layer height settings.
High print speed can cause the extruder to push out more material than necessary, resulting in over-extrusion. Similarly, improper layer height settings can lead to the deposition of excessive layers, causing bulging and imprecise detailing in the printed food product.
To mitigate over-extrusion and uphold print quality, it is crucial to optimize print speed and ensure accurate layer height settings, thus facilitating the precise deposition of food materials during the 3D printing process.
Nozzle Clogging Issues
To address nozzle clogging issues in food 3D printing, it is essential to carefully monitor the extrusion process and maintain optimal material flow. Nozzle maintenance is crucial to prevent clogging, including regular cleaning and inspection for any buildup.
Additionally, ensuring the correct filament diameter is essential as deviations can lead to inconsistent extrusion and potential clogs. Monitoring the temperature settings can also help prevent over-extrusion, which can contribute to nozzle clogging.
Under-Extrusion
How can under-extrusion be identified and resolved in food 3D printing processes?
Under-extrusion occurs when the 3D printer is unable to supply the necessary amount of filament for the printing process, leading to incomplete or weak prints. It can be identified by observing thin or uneven layers, gaps in the printed object, or a decrease in the overall structural integrity of the print.
To resolve under-extrusion in food 3D printing, several factors need to be addressed. Firstly, check the filament flow by ensuring that the filament is not tangled or restricted in the feeding system. Additionally, examine the printing speed as under-extrusion can occur if the printing speed is too fast for the chosen filament or if the nozzle diameter is too small for the desired flow rate. Adjusting the printing speed and nozzle diameter, as well as ensuring proper maintenance of the feeding system, can help mitigate under-extrusion issues.
Frequently Asked Questions
How Can I Prevent Contamination of My Food 3D Printer Nozzle?
To prevent contamination of a food 3D printer nozzle, ensure thorough cleaning and sanitation practices. Regularly disassemble the nozzle for deep cleaning, utilizing appropriate cleaning agents and methods to maintain optimal hygiene and prevent any potential contamination.
What Are the Best Practices for Achieving a Smooth and Consistent Texture in 3D Printed Food?
Achieving uniformity in 3D printed food requires precise control over printing parameters. Texture consistency can be achieved by optimizing material viscosity, layer thickness, and temperature. Minimizing texture variations enhances the overall quality of printed food.
Are There Any Specific Techniques to Prevent Warping and Curling of 3D Printed Food Items?
Preventing warping and avoiding curling in 3D printed food items requires meticulous attention to print bed temperature, layer adhesion, and cooling processes. Optimizing these factors helps maintain the structural integrity of the printed food items.
What Are Some Tips for Improving Adhesion of Food Materials to the 3D Printer Bed?
Improving adhesion of food materials to the 3D printer bed can be achieved by optimizing the printer bed temperature, selecting suitable food material properties, and using adhesion aids such as oil or non-stick coatings.
How Can I Troubleshoot and Fix Filament Jamming Issues in My Food 3D Printer?
When troubleshooting extruder clogs and clearing nozzle blockages in food 3D printing, ensure the filament is of the correct diameter, optimize temperature settings, and regularly clean the extruder and nozzle to prevent jamming issues.
Conclusion
In conclusion, troubleshooting common issues in food 3D printing is essential for achieving high-quality and consistent results. By addressing clogged nozzles, inconsistent texture, warping and curling, adhesion problems, filament jamming, poor layer adhesion, over-extrusion, and under-extrusion, users can ensure smooth and efficient printing processes.
Just like a skilled chef meticulously adjusts the heat and timing to create a perfectly cooked dish, meticulous attention to detail in 3D printing can result in flawless and appetizing creations.