Did you know that the global market for food 3D printing is expected to reach $525.6 million by 2027?
As this innovative technology continues to gain traction, understanding how to set up your first food 3D printer is crucial for enthusiasts and professionals alike.
In this step-by-step guide, we will explore the process of selecting, setting up, and operating a food 3D printer, as well as troubleshooting common issues and delving into advanced techniques.
Understanding Food 3D Printing Technology
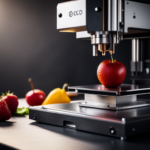
Understanding Food 3D Printing Technology involves grasping the principles and processes behind the additive manufacturing of edible materials. This technology utilizes food materials such as chocolate, cheese, and dough, which are deposited layer by layer to create 3D edible structures. The printing process typically involves steps such as digital modeling, slicing the model into layers, and then printing each layer using a food-grade 3D printer.
When considering the cost and investment, it’s essential to account for the price of the 3D printer, maintenance costs, and the expenses associated with sourcing food-grade printing materials. Additionally, market trends play a crucial role in guiding investment decisions. As the technology matures, the market trends indicate a growing demand for personalized and customized food products, which is driving the adoption of food 3D printing technology in commercial kitchens, bakeries, and confectioneries.
Understanding the intricacies of food materials, the printing process, cost and investment considerations, and market trends is pivotal for individuals and businesses looking to venture into the realm of food 3D printing. This knowledge forms the foundation for making informed decisions and leveraging the potential of this innovative technology.
Selecting the Right Food 3D Printer
Choosing the right food 3D printer involves considering several key factors.
First, the printer size and capacity must align with the volume of food production needed.
Additionally, the printer’s compatibility with different types of food and its safety features are crucial considerations.
Printer Size and Capacity
Selecting the right food 3D printer requires careful consideration of the printer’s size and capacity.
When evaluating printer size, it’s essential to assess the physical dimensions of the printer, ensuring it fits within the available space in your kitchen or workspace.
Additionally, consider the printing capacity, which refers to the maximum volume of food that the printer can produce in a single print run. This is crucial for determining the scale of food items you can create and the quantity you can produce at once.
Understanding the printer’s size and printing capacity is vital for matching the printer’s capabilities with your intended use, whether it’s for personal culinary experimentation or large-scale food production.
Therefore, carefully assessing these factors will help you select a food 3D printer that aligns with your specific needs and requirements.
Food Compatibility and Safety
When considering a food 3D printer, it is essential to prioritize food compatibility and safety to ensure the selection of an appropriate device for culinary applications.
-
Food Safety: Look for printers with food-safe materials and components that comply with relevant safety standards to prevent contamination and ensure the production of safe edible items.
-
Ingredient Compatibility: Consider the printer’s ability to handle various food ingredients such as chocolate, cheese, or dough. Ensure the printer can extrude and handle these ingredients without compromising their quality or safety.
-
Certifications: Prioritize printers that have relevant certifications for food safety and quality standards, such as FDA approval, ensuring that the printer meets regulatory requirements for food production.
User-Friendly Interface Options
The user-friendly interface of a food 3D printer significantly impacts its usability and efficiency in culinary applications. When selecting the right food 3D printer, it’s crucial to consider interface customization and user experience.
Look for a printer that offers intuitive software integration and design options, allowing for seamless navigation and customization of printing settings. A user-friendly interface should simplify the process of creating and modifying 3D food designs, making it accessible to both experienced chefs and beginners. Additionally, the ability to preview and adjust designs directly on the printer’s interface can greatly enhance the user experience.
By prioritizing a user-friendly interface, chefs can streamline their food 3D printing workflow and bring their culinary creations to life with ease.
Transitioning into the subsequent section about ‘setting up your food 3D printer’, the next step is to explore the hardware setup and initial calibration process.
Setting Up Your Food 3D Printer
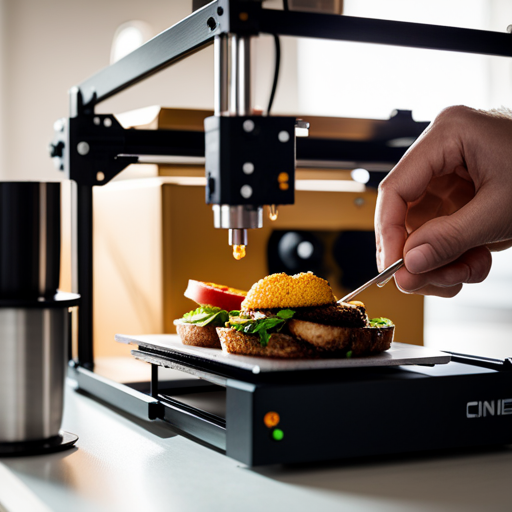
To begin setting up a food 3D printer, ensure that all components are unpacked and accounted for. Check that the printer has its necessary parts, such as the extruder, printing bed, and filament. Once everything is confirmed, proceed with the assembly and calibration of the printer.
Setting Up Your Food 3D Printer
-
Food Extrusion Techniques: Familiarize yourself with the specific food extrusion techniques that your 3D printer utilizes. Some common methods include paste extrusion and pneumatic extrusion, each with its own unique requirements and settings.
-
Edible Ink Options: Research and select suitable edible ink options for your food 3D printer. Consider factors such as taste, color vibrancy, and compatibility with the materials you plan to use. It’s essential to use edible ink that is safe for consumption and adheres well to the printing surface.
-
Calibration and Testing: After the initial setup, calibrate the printer according to the manufacturer’s instructions. Test the printer with non-edible materials to ensure that it operates smoothly and accurately before attempting to use it with food ingredients.
Preparing Food for 3D Printing
Preparation of food for 3D printing involves meticulous consideration of ingredient texture and consistency. Before attempting to 3D print food, it is essential to prepare the ingredients in a manner suitable for the printing process. This involves finely tuning the texture and consistency of the food materials to ensure optimal printing results.
For instance, purees, gels, and pastes are often preferred due to their smooth and uniform texture, which facilitates the extrusion process. It is also crucial to consider the printability of the ingredients, as certain foods may require additives or modifications to achieve the desired printability.
Furthermore, recipe customization is a key aspect of food preparation for 3D printing. By adjusting ingredient proportions, modifying cooking methods, and incorporating food-safe thickeners or stabilizers, it is possible to create recipes specifically tailored for 3D printing. Additionally, exploring different flavor infusions and color variations can enhance the aesthetic appeal of the printed food items.
Operating Your Food 3D Printer
Now that your food 3D printer is set up, it’s crucial to focus on its operation and maintenance.
This includes understanding important printer maintenance tips to keep it functioning optimally, adhering to food safety guidelines to ensure the edibility of the printed food, and troubleshooting common issues that may arise during the printing process.
These points will help you navigate the operational aspects of your food 3D printer smoothly and effectively.
Printer Maintenance Tips
Performing regular maintenance checks on your food 3D printer ensures smooth and efficient operation. To keep your printer in optimal condition, consider the following maintenance tips:
-
Cleaning Schedule: Regularly clean the printer’s extruder, nozzle, and build platform to prevent clogs and contamination.
-
Troubleshooting Techniques: Familiarize yourself with common issues such as filament jams or calibration errors, and learn how to address them effectively.
-
Component Inspection: Periodically inspect and tighten belts, screws, and other mechanical components to maintain precision and prevent malfunctions.
Regular maintenance not only prolongs the lifespan of your food 3D printer but also ensures consistent print quality.
Now, let’s delve into the crucial aspect of ‘food safety guidelines’.
Food Safety Guidelines
The proper adherence to food safety guidelines is crucial when operating a food 3D printer. Safe handling of ingredients is essential to prevent any contamination that could compromise the quality and safety of the printed food.
It is imperative to ensure that the ingredients used are fresh and suitable for 3D printing. Cross-contamination prevention methods, such as using separate storage and handling areas for different food types, should be strictly followed.
Additionally, regular cleaning and sanitization of the 3D printer components that come into contact with food are essential to maintain a hygienic printing environment.
Adhering to these food safety guidelines is fundamental in producing safe and high-quality 3D printed food products.
Troubleshooting Common Issues
When operating a food 3D printer, it is essential to be prepared to troubleshoot common issues that may arise during the printing process. Here are some common problems and their solutions:
-
Troubleshooting Nozzle Clogs: One of the most frequent issues with food 3D printers is nozzle clogs. This can happen due to residue buildup or improper temperature settings. To address this, carefully remove the clogged material, clean the nozzle thoroughly, and ensure that the food material is at the appropriate temperature for extrusion.
-
Calibration Issues: Calibration problems can lead to misaligned layers or skewed prints. To troubleshoot this, recalibrate the printer according to the manufacturer’s guidelines and ensure that the build plate is level and properly adjusted.
-
Print Quality Problems: Issues such as under-extrusion, over-extrusion, or warping can affect the quality of your prints. Adjusting the extrusion settings, temperature, and print bed adhesion can help resolve these issues.
Remember to refer to the printer’s manual for specific troubleshooting instructions.
Troubleshooting Common Issues
To effectively troubleshoot common issues with your food 3D printer, it is important to systematically identify and address any technical hitches that may arise during the printing process.
One of the common issues that may occur is the clogging of the printer nozzle. This can be resolved by carefully inspecting and cleaning the nozzle to remove any accumulated food material.
Another troubleshooting tip is to check for loose or misaligned printer components, which can lead to print quality issues. Ensuring that all components are securely in place and properly aligned can help resolve this issue.
Additionally, inconsistent extrusion or layer adhesion problems may arise, which can be addressed by calibrating the extruder and ensuring the printing temperature is optimized for the food material being used.
It is also important to regularly maintain and clean the printer to prevent potential issues.
Exploring Advanced Food 3D Printing Techniques
After addressing common troubleshooting issues, it is essential to delve into three advanced food 3D printing techniques that can elevate the precision and complexity of your printed food creations.
-
Multi-ingredient Printing: Utilize the capability of your food 3D printer to handle multiple ingredients simultaneously. By carefully coordinating the deposition of different food materials, intricate and flavorful multi-layered creations can be achieved, adding depth and variety to your dishes.
-
Texture Control: Advanced food 3D printers offer the ability to control the texture of the printed food. This technique allows for the creation of foods with varying densities, from airy and delicate to dense and substantial, enhancing the overall sensory experience of the dish.
-
Customized Infusions: Experiment with infusing flavors and nutrients into your printed foods. By using advanced techniques, you can precisely infuse liquids, oils, or other flavorings directly into the structure of the printed food, opening up a world of creative recipes and unique culinary experiences.
Exploring these advanced printing techniques will undoubtedly expand the creative possibilities for your food 3D printer, enabling you to craft intricate, multi-textured, and flavor-infused dishes that were previously unattainable.
Frequently Asked Questions
Can I Use Any Type of Food With a Food 3D Printer, or Are There Limitations on What Can Be Used?
Food 3D printers have limitations on the types of food they can use. Ingredients need to be prepared in a way that suits the printing process. The printer’s compatibility with different foods varies, impacting the range of items that can be printed.
Are There Any Specific Safety Precautions I Should Be Aware of When Using a Food 3D Printer?
When using a food 3D printer, it’s crucial to prioritize food safety. Regular maintenance of the printer is also essential to ensure its proper functioning. Following safety guidelines, cleaning protocols, and using food-grade materials are imperative.
How Do I Clean and Maintain My Food 3D Printer to Ensure It Continues to Work Properly?
To maintain proper functionality of your food 3D printer, adherence to a regular cleaning schedule is crucial. Utilize gentle cleaning techniques to remove food residue and prevent clogs. Additionally, follow the manufacturer’s maintenance schedule for optimal performance.
Are There Any Special Considerations for Storing 3D Printed Food, Such as Shelf Life or Preservation Methods?
When storing 3D printed food, it’s important to consider shelf life, packaging methods, and food safety. Ingredient limitations, design compatibility, and recipe customization should also be taken into account to ensure optimal preservation and quality.
Can I Use Pre-Made Designs or Recipes With a Food 3D Printer, or Do I Need to Create My Own Designs From Scratch?
In the world of food 3D printing, the flexibility of using pre-made designs or customizing recipes is a game-changer. The technology offers impressive design flexibility and food compatibility, enabling both novice and experienced users to create delectable culinary delights.
Conclusion
In the journey of setting up your first food 3D printer, we have laid out the fundamental steps required for success.
Just as a chef carefully selects the finest ingredients and meticulously crafts a dish, the process of food 3D printing requires attention to detail and precision.
By understanding the technology, selecting the right printer, setting it up, preparing food, and operating the printer, you can embark on a culinary adventure with endless possibilities.